Bubba Strikes Again
Here are compiled some of the things I have seen over the years. Some are just easier to believe if shown in a picture.
Enjoy. Names have been left off so save any embarrassment. Most of these were done by shops, not the owners.
We will
hence forth refer to the Ace Mechanic responsible for such exquisite work as "Bubba".
Be careful what you pay for
as some of you own the cars that this work was done on.
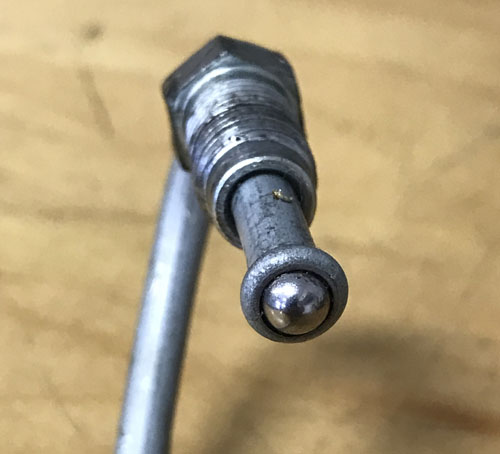
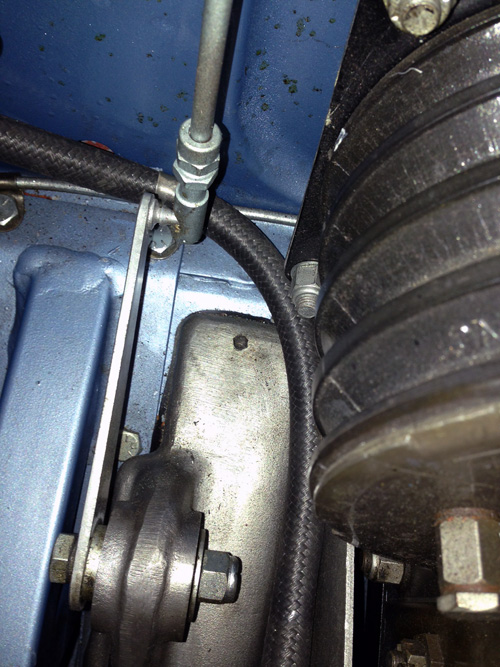
Above is a picture of a caliper bridge pipe on a Series 1 XKE rear caliper. The early cars used a ball bearing
to seal the bleeder hole. I guess someone thought that it would work with the pipe to seal also. It worked as no fluid flowed
from one side of the caliper to the other. And they did this on both sides! They even added remote bleeders to the calipers so
I guess they thought that these would be needed somewhere. BTW: pipe is now scrap as the ball is firmly embedded.
Both sides
are like this and the pipes still had some of the new labels on them.
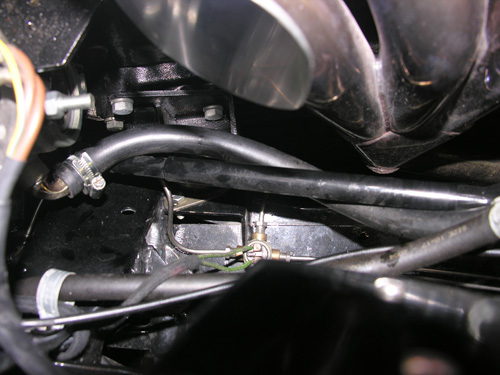
Here is a Mark 2 that has had some performance enhancements such as Headers. The car also has power
steering. You can see the power steering hose in the center of the picture. Rather than secure the hose to the frame
or some other fixed area, they must have felt it better to wrap it around the steering shaft. A few more miles and it would have
rubbed through.
This work was done by a high end shop or at least it is high end because of their prices. It is a Series 1 XKE with
a set of performance cams with no oil hole on the lobes. Car came in for excessive valve noise. In normal running, the cam
lobes are splash fed. I guess they thought that it would be better to let the oil drain back to the sump quicker so an oil
drain hole was added. No splash lube and a lot of clatter resulted.
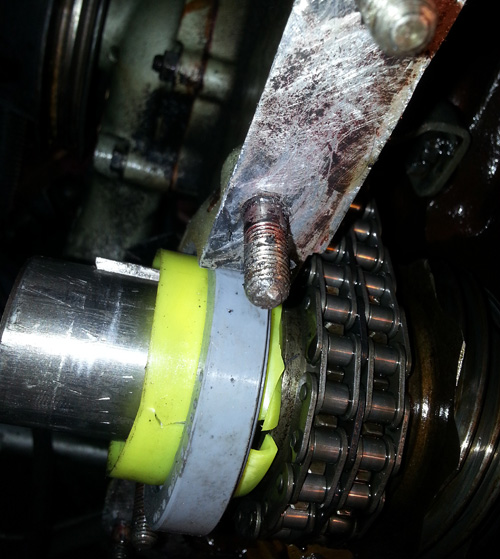
This was done by the owner and picture was provided and used with permission. The yellow piece
is there to protect the teflon front seal from damage during packaging. It should be removed before install.
It was not and as such ruined the seal.

Engine came in with a lot of leaks after being rebuilt by a shop. If you look closely, you will notice
that the seal is in backwards. It is a updated Teflon seal though but still does not work well when
installed backwards.
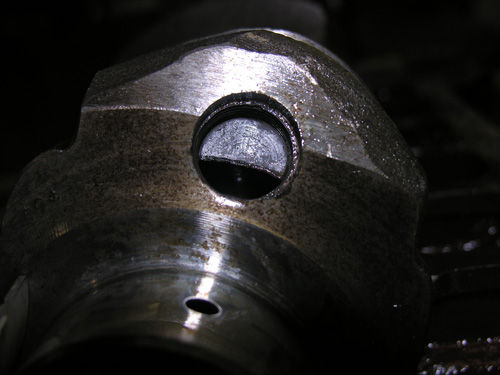
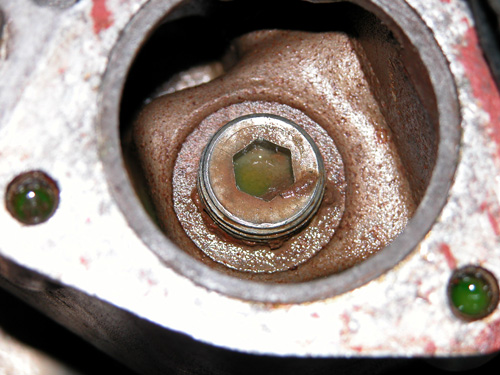
Although not a rebuild gone bad, it does happen to rebuilds. The crank plugs need to be removed
and the crank cleaned out. The dirt accumulation inside the crank has almost filled the oil hole. If not cleaned
out, it can come loose and eat the bearings before your fresh rebuild covers 100 miles.
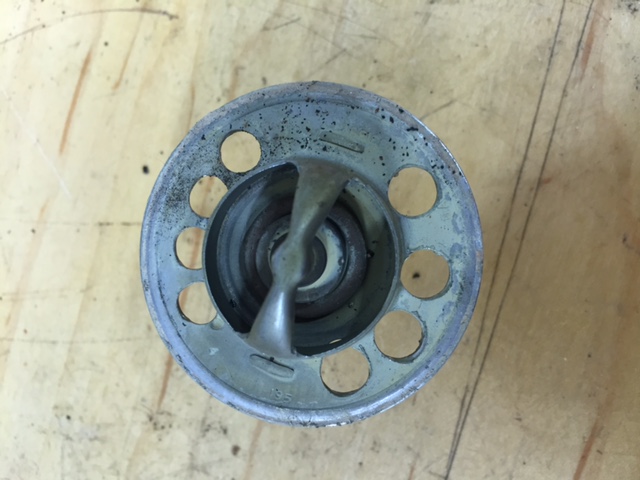
I guess this was an attempt at a high flow thermostat. I doubt that this car ever warmed up properly.
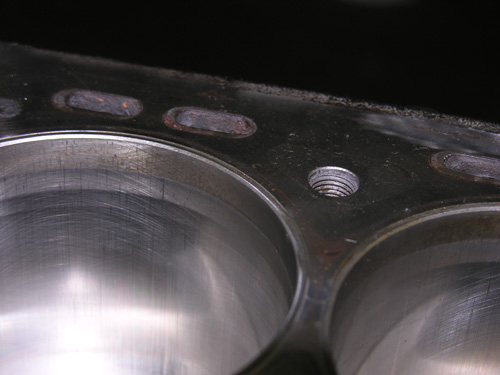
This one is not as obvious but look closely at the edge of the sleeves. They have shifted down. All 6 did this
and it caused the head gasket to blow resulting in water in the oil. The engine was sent back to the rebuilder
and it was returned "repaired". It was not repaired. BTW: same renowned shop that added the oil drain
holes in the cylinder head.
The fix here was new sleeves properly installed and locked in place.
A lot of work to have to pay for twice.
Some people blank off the thermostat by-pass to make all the water go into the radiator when using the
incorrect thermostat. This method blocked off the bypass but also blocked the thermostat from opening which
caused the car to overheat even worse. Best to use the original parts as designed unless you are an engineer and really
have a better method.
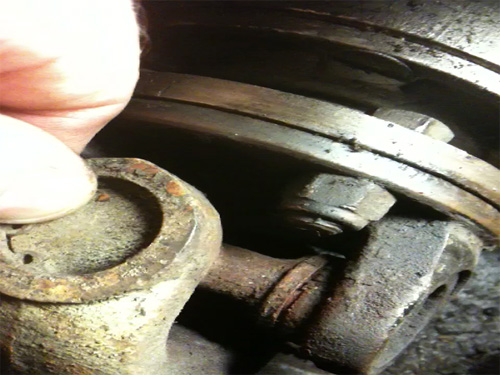
The picture above is a link for a short video of a worn out u-joint. Click on the picture. The car was driven to the
shop in this condition. Lots
of vibration.
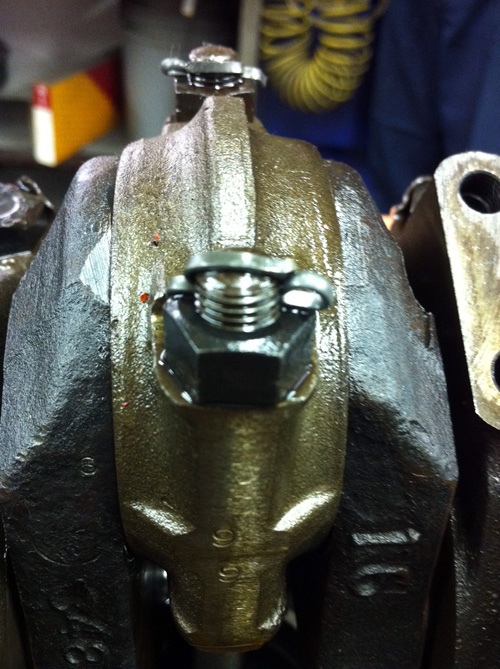
It is bad enough to reuse rod nuts and bolts with the older cotter pin style. It is worse
to use a regular nut and still put a cotter pin. This is not going to keep the nut from turning.
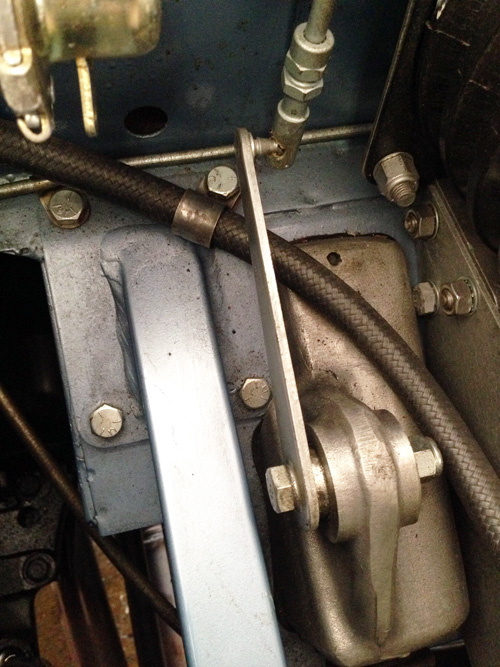
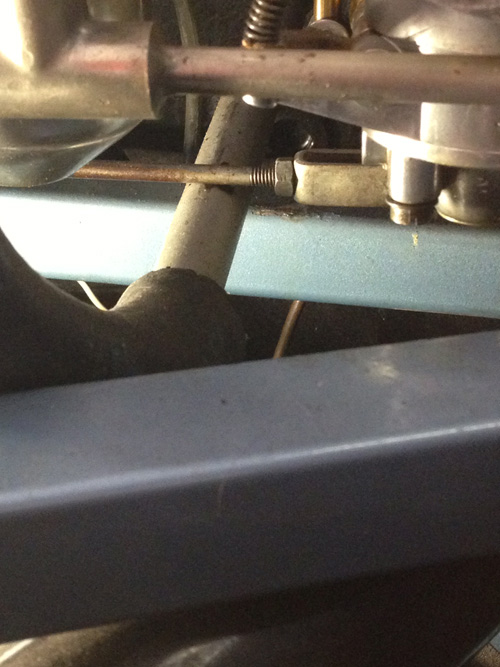
This brake vacuum was not installed correctly and as such, keeps the throttle from fully
opening. In fact, it pushes on the hose and would eventually cut through. The picture below
has the corrected positioning.
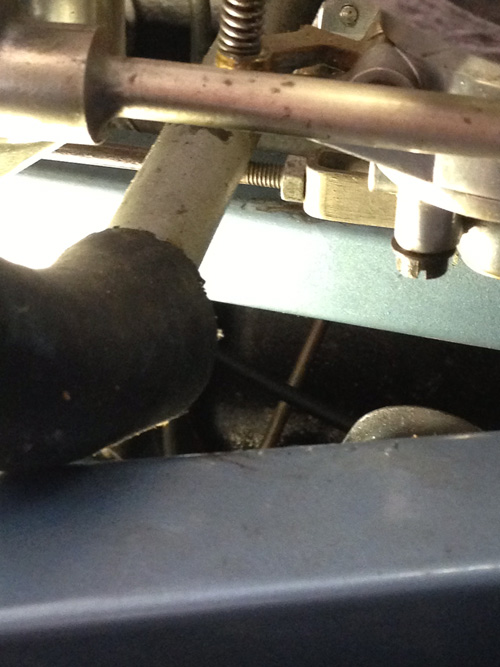
Series 1 XKE. You can see the breather pipe under the choke linkage rod. There is a
rub mark showing where the pipe has been sliding across causing binding and a very stiff
choke lever. The picture below is the corrected position .
Not how to set the timing correctly with this setup:
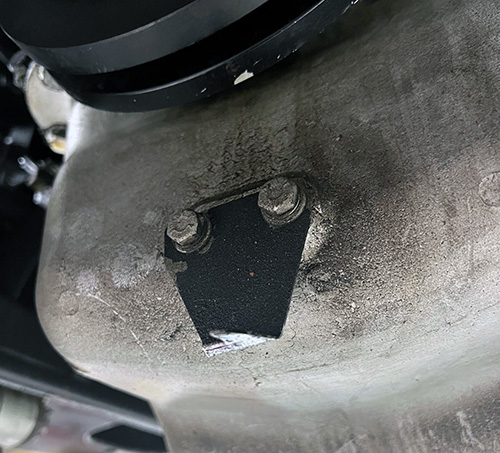
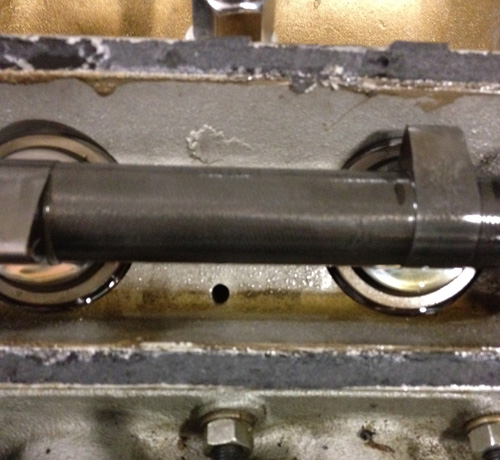
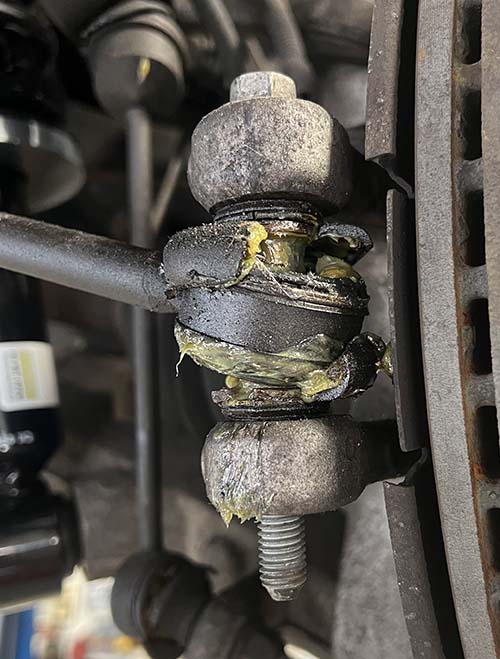
Here is the rear steering arm, right side on a 2008 XJ8 that had recently been in the dealer
to have the right rear air shock replaced. (somewhat visible on the left of the picture)
Not that the lack of rubber around the grease is bad enough, but
they left the retaining nut off of the bolt. Good thing gravity works.
Owner mentioned a slight
knocking sound.
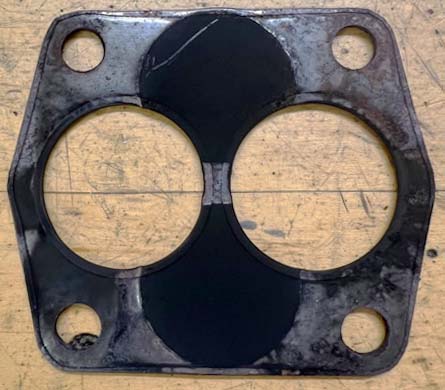
In the picture below, a "restoration shop" restored a TR6. Among the many problems
encountered to get it running, the exhaust downpipe had a pretty good leak. In pulling it apart
fix the leak, it was apparent that the metal gasket was put in 90 degrees off. If you finish
the circles, you will see how little room the exhaust had to flow through.