This started out as a car coming in for a oil change and carburetor adjustment. As usual, there were a few other items to check on while it was in. Check oil leaks and wheel balance. Very straight forward at this point. For information: the engine and transmission had been rebuilt by a professional shop about 3 years previously. What followed is documented below.
I put some UV dye in the oil which is by far the easiest way to find leaks. They will show up even on a greasy engine. Then went for a test drive. Clutch had excessive free play from improper adjustment. Steering wheel would shake out of your hands. Car pulled to the right under crusing or braking. Engine ran rather poorly but then it came in for Carburetor adjustment.
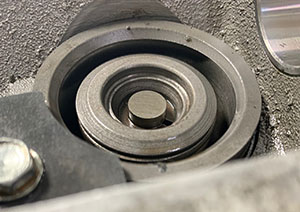
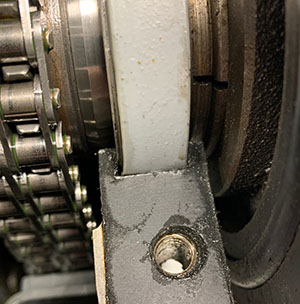
I then put it on the lift. Adjusted the clutch which fixed one problem. I noticed the rear support pin was locked in place. On the XKE 6 cylinder SWB models, this pin is supposed to float. It is stabilized by the middle support.
I then went to the UV light to check for leaks. The rear seal, front seal, timing cover and cam covers were leaking on the engine. The transmission was leaking out of the rear and dripping on the exhaust causing smoking at stop lights. This was the worst leak causing the transmission to be 2 pints low on fluid. This is very low as it only holds 4 pints. So at this point, engine is coming out of the car.
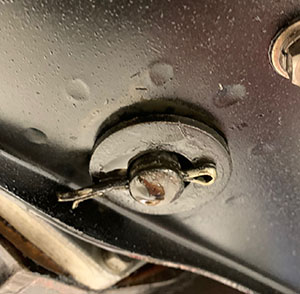
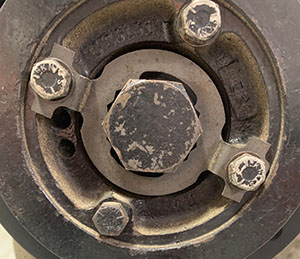
Upon checking the rear, seems to be mostly out of the speedometer drive. Pulled the lock bolt and slid out the drive gear.
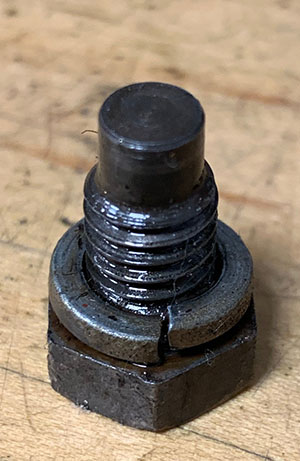
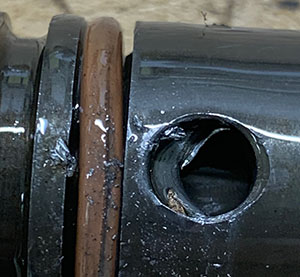
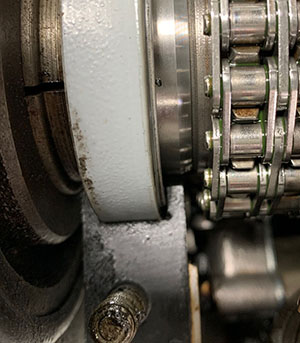
The lock / positioning bolt was supposed to have a copper flat washer to seal it up. The lock washer does not seal. This bolt did not line up with the hole in the drive housing as I guess it was not positioned before inserting bolt. It must have been driven in hard as it deformed the hole and ended up cross threading in the rear housing. So the rear housing of the transmission comes off. First thing I notice there is the drive flange is not very smooth to say the least.
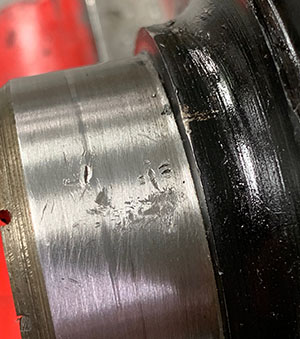
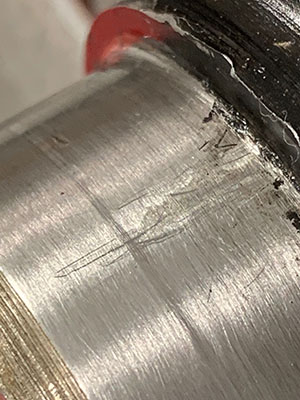
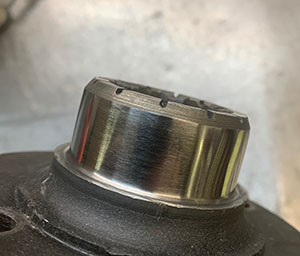
This surface would act like a high speed file on the seal, eventually cutting it down where it would not seal at all. After polishing, the picture below shows how it should look. Seal was replaced, the hole straightened and heli coil repaired. The housing had some damage so a bit of sealer was used in addition to a new o-ring and new shaft seal installed.
Onto the engine. First thing I noticed was the front lock plate looked as if it had never been used. The lock tabs were not bent over to secure the bolts. This was not causing a problem at this time but surprised none the less.
The rear seal was the later rubber conversion style. This particular design had a seal with one side split. It is installed on the crank, spring put in place and then the metal housing assembled around it. Then the housing bolts up to the engine. To do this, the upper bolt is shorter as is the housing so all three bolts can be removed and installed without removing the crankshaft. The seal housing is supposed to have some sealer in it also. I know this because I identified the seal kit as one from SNG Barratt and obtained the directions. Whoever had put the engine together had put the seal on the crank and the rear upper housing on the block and then put the crank in. No sealer was used and the long stock upper bolt was used which negated removal without removing the crank. I followed the directions when putting it back together.
Front seal was the updated teflon style. The outer lip was folded in which means the spacer/collar which rides on the inside was installed before the pan which is needed to compress the seal into place and be centered. There was also no silicone sealer on and around the seal as pictured.
>
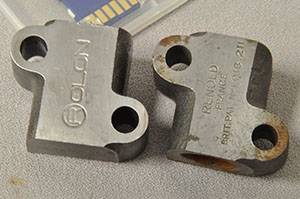
The hydraulic timing chain tensioner was of the "Rolon" brand. I have had some bad results as the "shoe" can become loose from the base. The original Renold brand actually goes over the front and rear edge for more security. These are worth searching out if you are building an engine. The Renold is on the left below. The right picture shows the exposed metal on the Rolon.
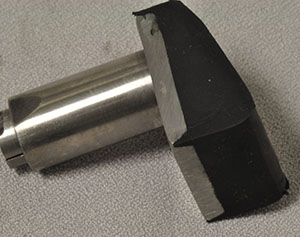
Once the bottom end was buttoned up, it was time to replace the valve covers. Upon taking them off, I discovered that the scalloped chain drive had been left in the engine.
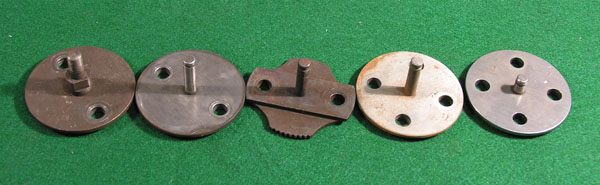
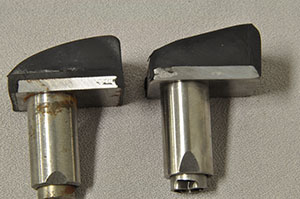
The Gear in the center is the bad style. The others have the full circle of teeth. The far right has a shorter centering pin and is on the V12 engines. It will work on the 6 cylinder engine.
These were used for a very short time in 1969 before Jaguar switched back to the full circle 180 tooth design. These can slip with exciting results. As I had to remove the cams to replace them, I checked cam timing and valve adjustment. I had set up TDC after replacing the front timing cover. After setting up the cams with the positioning tool, the cams were 5 crankshaft degrees off. Valve adjustment was no more than a couple of thousands off except for the rear exhaust valve. It was reading .001". Upon taking off the tappet, the valve had been cut to the point that the shim was not sitting on top of the valve but resting in the collar with a .006" gap between the shim and the valve. When the valve opens, the force will cause the valve to unkey and the valve hit the shim with a tapping or knocking noise. Eventually it can wear and break something. The proper fix is to pull the head and replace the valve. The short gap is to radius the bottom of the shim so it can sit down into the collar further and rest on the tip of the valve. Sometimes a deep reach tapped is needed to make sure the tappet is also pushing on the shim instead of the collar. Re check valve clearance once positive contact is achieved.